


Building a deck is a great way to expand your living space and extend your home. But best of all, with a bit of planning and the right equipment, you can do it yourself!
We’ve teamed up with industry experts, Kennards Hire, to find out exactly how to go about building a beautiful deck in Australia. From the very first steps right through to maintenance, they’ve got all the essential tips you need to know.
Types Of Decking
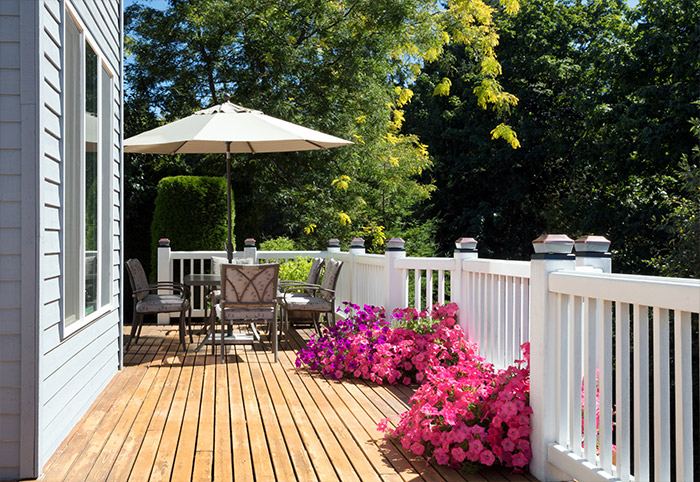
Timber is the most common material option for decking, ranging from imported hardwoods (like Merbau) to Australian hardwoods such as jarrah and spotted gum. Treated pine is a quick-growing plantation timber that is environmentally sustainable, cheap, light and durable.
Keep in mind that all timber decking requires regular maintenance, including staining, to keep it looking good.
Becoming more popular with DIY builds, composite boards, made from recycled wood pulp, sawdust and plastic, are more environmentally sustainable than timber. They can initially be more expensive but the extra cost can be recouped over the years with reduced maintenance costs.
How To Build A Deck In Australia
Naturally, many people become concerned about tackling DIY decks, thinking them a little too big to take on solo. But rest assured, with access to the right equipment and some sound advice, it’s completely achievable for almost any Australian home.
Here’s what Kennards has to say about building DIY decks.
Planning To Build A Deck
Pick the perfect location for your deck
Unless you live in the tropical north of Australia, you’ll want your deck to be positioned on the sunny side of the house, sheltered from heavy wind and weather. Ideally, it will be at the same height as the house floors, so the outdoor area is an extension of the house.
Investigate required permits
Once you’ve got your direction sorted, before embarking on this project, it is important to check with your council first as building codes vary from state to state. In Victoria, for example, all deck building needs a permit, even for a small, low deck.
Check what’s underground!
It is also important to check for sewerage, water and gas pipes and electrical cables. To prioritise safety and efficiency, do not begin your build until you know it is clear below ground. If you plan on digging lower than 30 centimetres, utilise the service Before You Dig, which is Australia’s free referral service for information on the location of underground infrastructure.
Get your plans drawn up
To draw up plans, you can either employ a professional drafter, use free design tools online or use good old-fashioned pen and paper.
Hire the right equipment for the job
Having the right tools on hand makes all the difference to the success of your new deck.
Depending on the area to be cleared, consider using a mini loader with a posthole digger attachment to clear and level the area and dig the stump holes.
Starting Your Project
Dress for the occasion!
Like any DIY project, ensure you are wearing the correct PPE, gloves, steel-capped boots and full-length clothing that protects any exposed skin.
Mark your stump holes
Mark out your stump holes, measuring from the sill to the perimeter. These are generally around 1500mm apart. In some states, you will need to have the stump holes inspected before you can proceed.
Set timber guides
Nail a temporary timber guide to the house to mark the top of the bearer, allowing for the thickness of your decking (anything from 15mm to 25mm), plus the joists (90mm). Now you can run some string lines to show where the bearers will be positioned. Check levels and angles regularly.
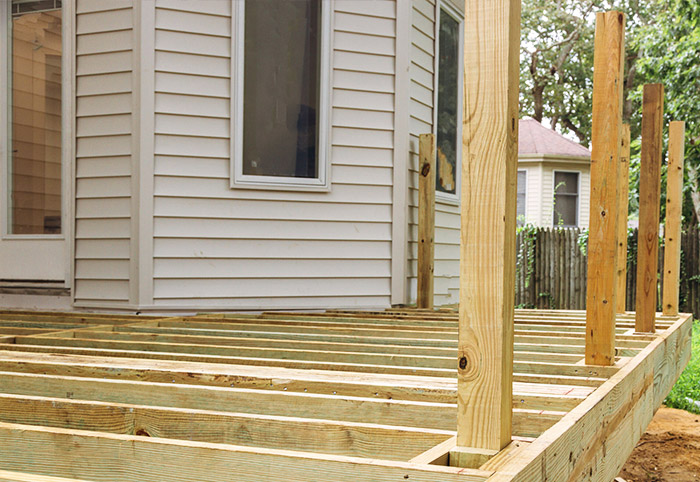
Cut, position and secure your bearers
Use a circular saw to cut your bearers to length. Glue two lengths together and nail for extra strength. Attach the double bearer to the temporary guide on the sill and run to a support post at the perimeter. Measure levels and secure the bearer to the post. Drill the bearer directly above each stump hole. Top concrete stumps with ant capping, thread rods through the holes in the bearer and tighten. Continue for the rest of the bearers and stumps – and don’t forget to check the levels.
Fill the stump holes
Use a concrete mixer to mix the concrete, fill each hole to the required height and leave to dry before backfilling.
Install the joists
With the stumps and bearers in place, the next step is to install the joists. Secure the first joist near the wall, using a nail gun to attach it to each side of the bearer. Measure out the other joists and attach them according to the plans.
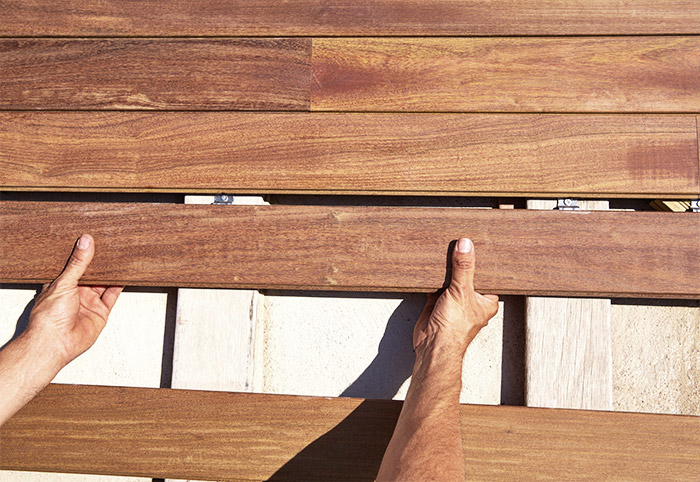
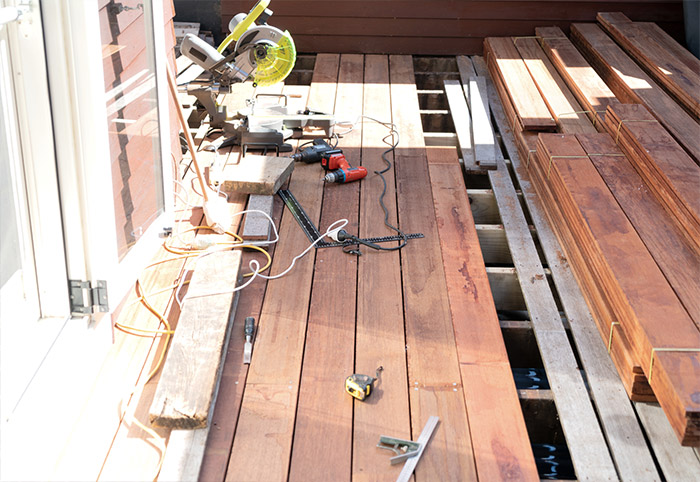
Laying The Decking
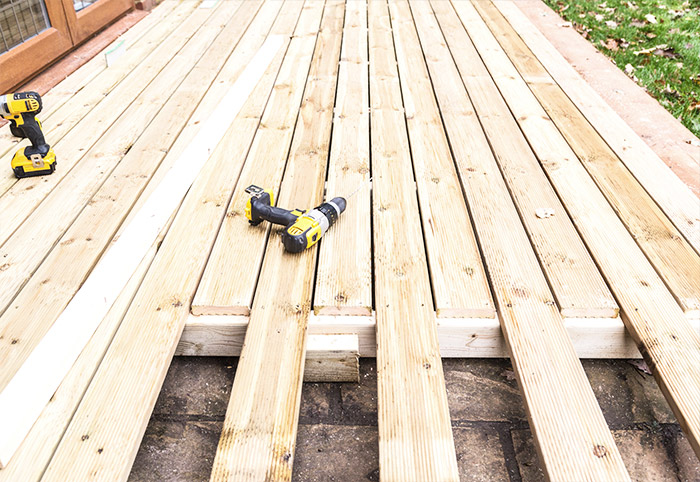
Secure your boards
Now for the easiest and most satisfying part of building a deck: laying the boards.
This is as simple as placing each board into position and using a nail gun or drill to secure them properly. Remember to leave a gap of about 3-5mm between each board for drainage and to allow for expansion of the boards – this is critical to avoid warping over time.
The Finishing Touches To Building A Deck
Does your deck need shelter?
When you build a deck, consider the overhead shelter. Will a gorgeous market umbrella do, or should you cover the deck with some form of roof?
If you’re putting up a roof, you’ll almost certainly require council approval, but a workaround is to use a shade sail. They are a practical alternative that is generally exempt from a building permit. Best of all, it’s removable in winter to allow maximum light and sun into the house.
Also, with a roof comes a lot more shade and less light, so you may want to install some barn lights to illuminate your outdoor living space.
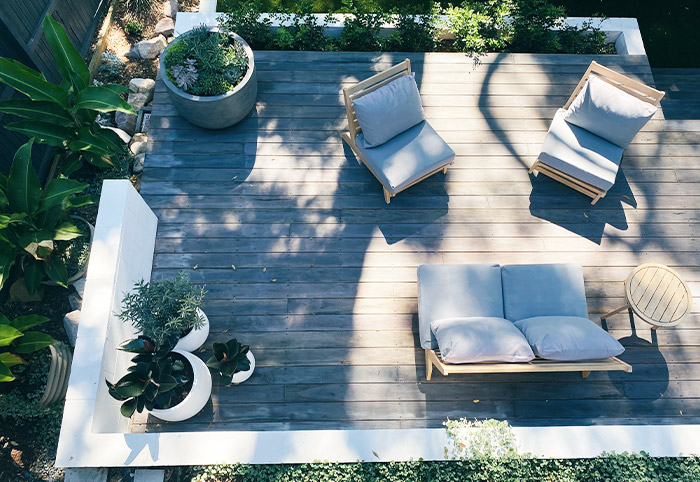
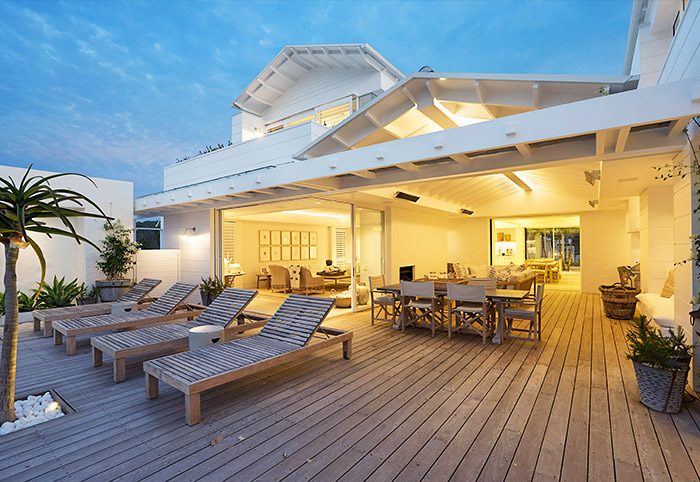
Choose your new deck furniture!
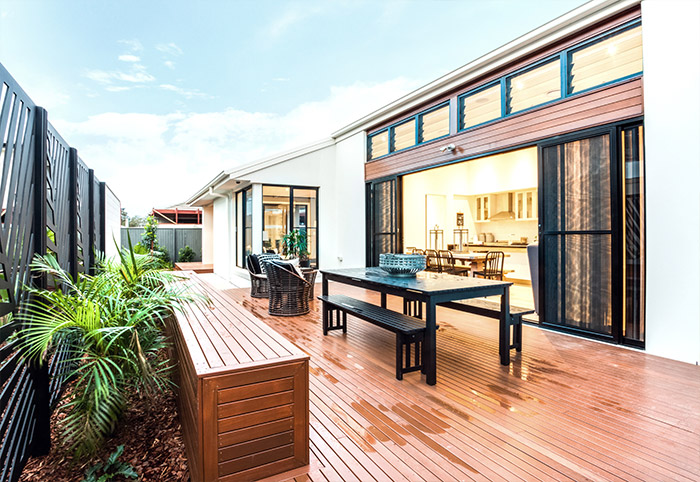
Now for the really fun part: shopping! All you need for great deck living is an outdoor dining table, a few designer beanbags and some gorgeous outdoor lights. It’s just like your own private resort right out the back door.
And Don’t Forget The Maintenance!
Pressure-cleaning is an effective method
Building a deck is one thing, but keeping it looking fabulous is another job in itself.
All timber decks need regular maintenance. When your deck starts to look a little tatty, it’s time for a quick refresh. Bang down any nails that are sticking out and use a pressure cleaner to blast dirt away.
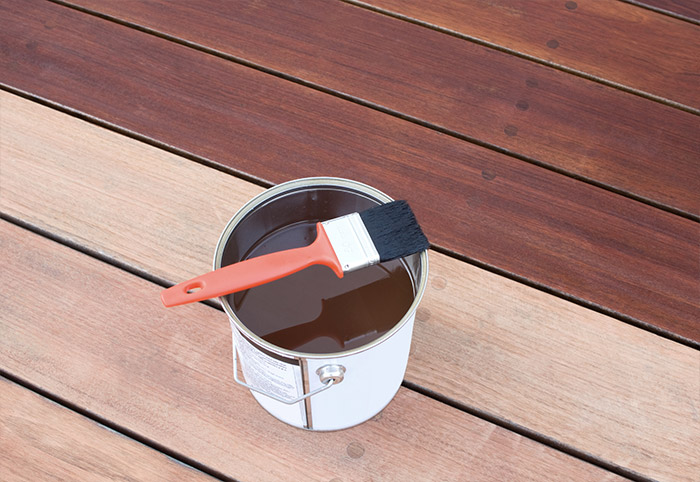
Re-stain when required
Once the wood is dry, you can re-stain. Use a paintbrush for the detailed areas next to the house. For the larger areas, a roller brush or an applicator pad with a long handle allows you to spread the stain quickly and evenly.
Head over to Kennards Hire for more DIY tips and tools.
Once your deck is built, it’s time to create the ultimate outdoor entertainment zone! Check out our top alfresco ideas for maximum livability!
-

-
-
MH514261, NSW
- 21 Sep 2025
-

-
-
ChiWren, QLD
- 31 Aug 2025
-

-
-
MH513363, QLD
- 28 Aug 2025
Post a commentTo post a review/comment please join us or login so we can allocate your points.